AI platforms provide users with many options, customizability, and save the creator time and money by making content for them.
6 Best AI Platforms for Social Media Content Creation in 2026 (Influencers’ Top Picks)
 Written By Shilpi Samantray
 Reviewed By: Khushi Choudhary
With the emergence of AI, now anyone has the potential to become a Social Media celebrity, but you must know which AI platforms to use to earn fame and land brand deals in the easiest way possible.
These platforms are used and recommended by your favourite influencers; they use them to give a professional touch to their content and make it feel more classy, engaging, and superior.
Moreover, these AI platforms contain all the essential features one requires to customize and curate their videos for social media, be it for a short-form or a longer, more cinematic video.
Key Takeaways
- AI platforms are essential for creators who want to grow on social media in 2026
- The best features of AI platforms that benefit influencers directly
- Top AI platforms influencers can use to create high-quality content
- Why Ethical values must be considered in AI-generated social content
Why AI Platforms Are Essential for Social Media Creators in 2026
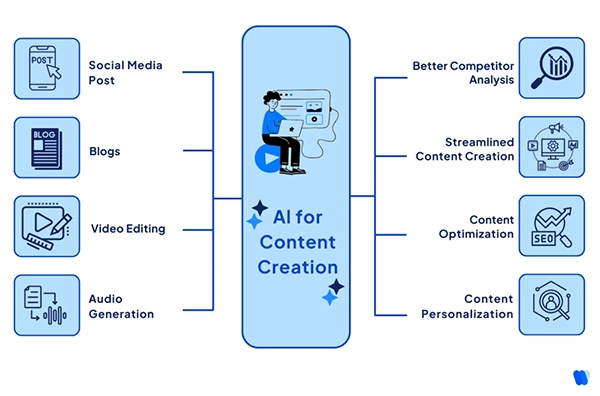
As depicted in the above infographic, Generative AI can serve different purposes in content creation, making it a useful tool for influencers as it helps with automation and time-saving techniques.
For Social media creators, AI offers many utilities to make their content creation fast and easy, with all the customization options and many other exclusive benefits.
Also, Aspiring influencers now have the option to refine their existing videos more with the assistance of AI to make their content perfect.
These benefits have made AI platforms essential for use if you are aiming to become a Social Media Influencer in 2026.
Key Features Influencers Should Look for in AI Content Platforms
There are a few features that make an AI platform actually helpful, as they solve the person’s issues and provide them with the most value. The following are the features influencers should look for in AI platforms :
- Automation – The capability of a platform to fully automate its workflow, so that the user doesn’t have to manually correct and guide it after every step, is a very important plus point of an AI platform. This saves up a lot of time for creators who like to create music, videos or images with it.
- Personalization – What differentiates a good AI platform from a great AI platform is the amount of personalization and customisability it can offer to the user. From pre-rendered templates to changing each asset of the video, the scalability of personalization offered matters a lot.
- Multi-Platform Compatibility – A top AI platform must be compatible with all types of input files, like JPG, PNG, mp4 etc., and more importantly, must be able to read and understand each file, and its properties. This way, valid adjustments can be made for a smooth AI workflow of content creation.
6 Best AI Platforms Influencers Are Using for Content Creation
The best AI platforms contain various features needed for content creation by influencers. The following are the 6 of the best AI platforms top influencers use to create content :
- MakeShot AI – It is a powerful AI Video Generator that unifies various generative AI software like Sora2, Nano Banana, and Veo 3, acting as an all-in-one platform for AI image, video, and content generation. Users can import files, lock the aspect ratio according to their need and customize it further with instructions to generate top-notch content for themselves and their viewers.
- Capcut – Using Capcut’s AI video editor, content creators can auto-caption, remove background, or even use AI templates for creating fast and engaging content. Its editor offers options for both short-form content, images, and long-form projects.
- Jasper AI – This platform is primarily designed for content marketing, blog posts, and social media captions, with “brand voice” features so a user can optimize their content for the demographic or audience that they wish to target.
- MidJourney – A tool made with a focus on image generation and editing. It contains exclusive features for creating artistic or photo-realistic images with a great emphasis on extraordinary quality. These are used for thumbnails, visual storytelling, and social media posts.
- ChatGPT – Widely used platform utilized to fulfill multiple purposes, but remains a standout in idea and script generation. It understands the scenario accurately and is capable of generating full-fledged scripts for the content and gives its own recommendations and ideas to make it even better.
- Synthesia – Used to create AI virtual avatars of yourself, which gives a face to the brand and can be used for multi-lingual content. It provides good functionality and creative options so that creators can curate the virtual avatars exactly to their liking and preference.
Combining the use of all 6 platforms can help your content improve substantially in the eyes of your audience, making your social presence distinct and unique.
Interesting Fact
Recent statistics on AI-generated content have shown that 71% of images shown on social media are now AI-generated
Ethical Considerations in AI-Generated Social Content
Although AI-generated content is progressing with astonishing speed, the ethical considerations and impact must be talked about and taken care of. It needs to tackle points such as transparency, fairness, misinformation, and take responsibility of it’s actions.
AI content has always been under scrutiny for taking credit for someone’s intellectual creation, and how it collects data for training itself brings up concerns over privacy.
The ways these concerns can be mitigated are:
- Option to opt out of training AI
- Regular Audits
- Governance of data
According to sources, The white house recently invested 140 million dollars in funding and providing policy guidance to take steps, understand, and mitigate these issues to control AI’s vast potential.
Similarly, UNESCO has laid out core principles for a human-centered approach to the ethics of AI.
Wrapping Up
The power of AI platforms is immense and can be used to help grow on social media as an influencer with useful features that boost the creative potential of our content, be it image, text, or video. Most importantly, saves content creators time and money.
Moreover, its ethical values must be considered and kept in mind while generating content, so that a human-centered approach is followed with a focus on transparency, fairness, and accurate information.
Frequently Asked Questions
Why are AI platforms best for content creation?
What are the most important features of an AI content platform?
The most important features of an AI platform used for content generation are automation, personalization, and multi-platform compatibility.
What are the ethical values that should be considered while using AI platforms?
The most important ethical considerations while using AI platforms are transparency, fairness, and taking responsibility for not spreading misinformation.
What are the best AI platforms for content creation?
The best AI platforms used for content creation are :
- ChatGPT
- MakeShot AI
- Capcut
- Midjourney
Related Posts